One click.
Claude Code launches.
Stop typing cd ~/projects/my-app && claude every time. Just click — and Claude Code opens right here.
The old way vs. the new way
No more juggling terminals and paths. One click replaces three steps.
cd ~/projects/my-appclaudeSimple, but powerful
Designed for developers who value speed and simplicity.
One Click Launch
Click the Finder toolbar button or right-click menu item. Claude Code opens instantly in the current folder.
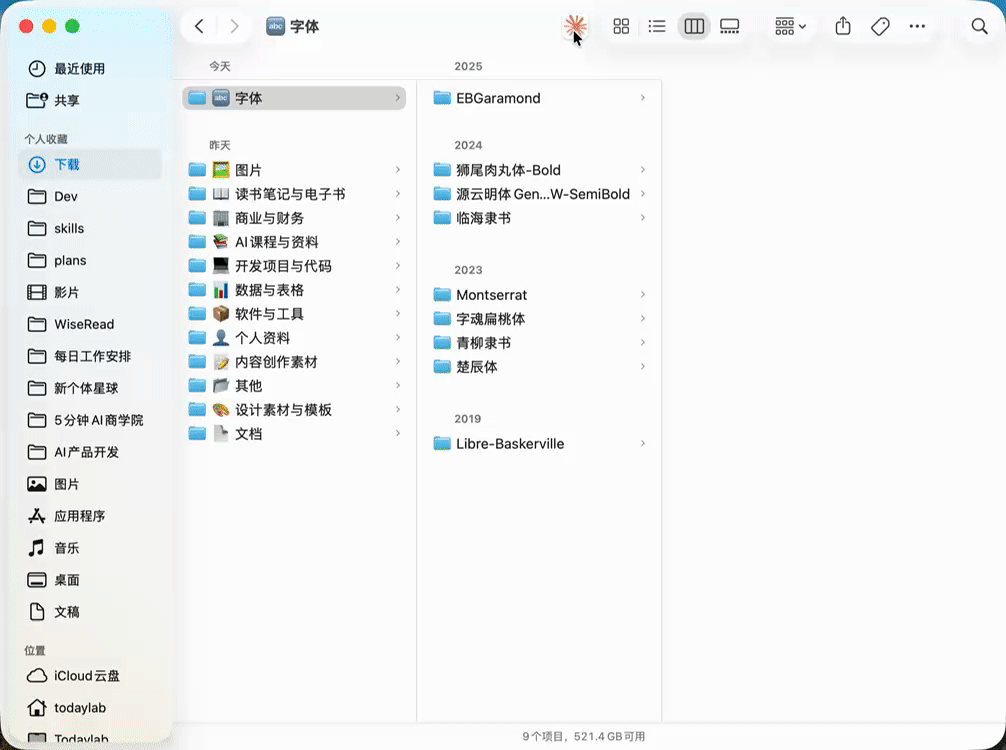
macOS Finder Toolbar
Adds a native toolbar button to Finder. Always visible, always one click away.
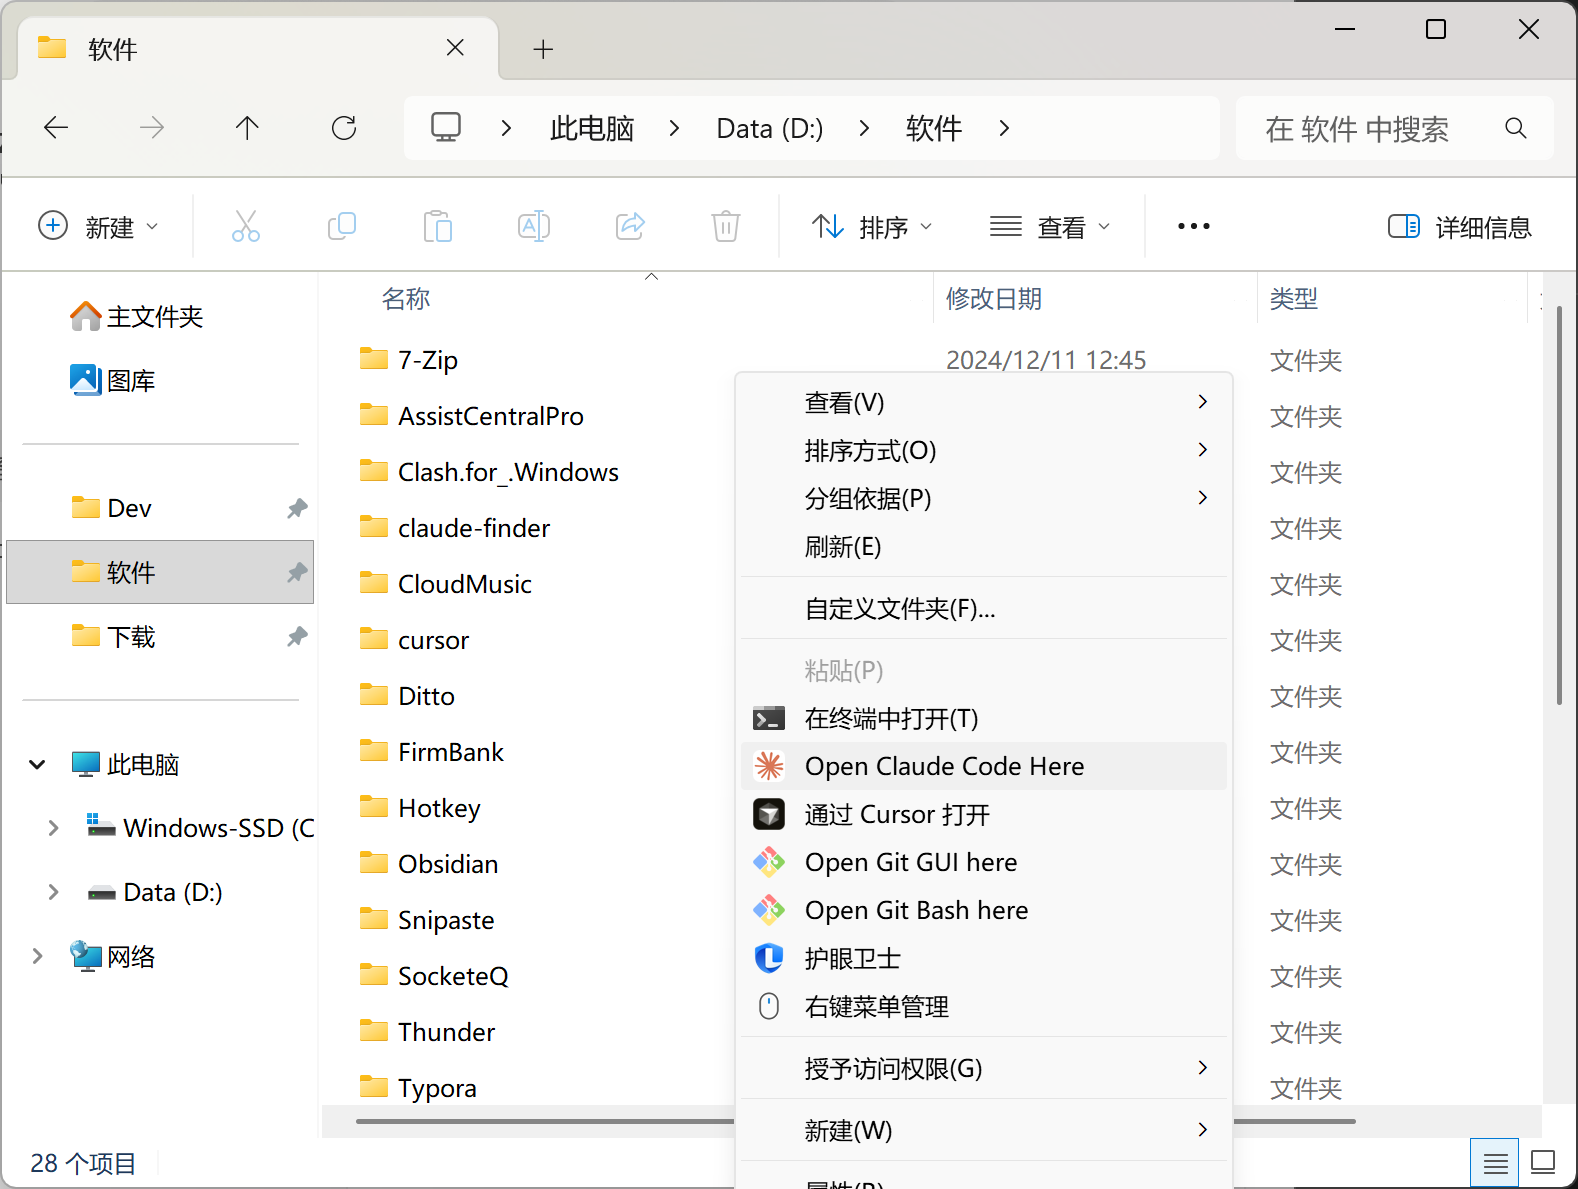
Windows Context Menu
Adds 'Open Claude Code Here' to the right-click menu in File Explorer.
Terminal Flexibility
Auto-detects Windows Terminal. On macOS, supports both Terminal.app and iTerm2.
Zero Dependencies
Just shell scripts and PowerShell. No Node, no Python, no package managers needed.
Open Source
MIT licensed. Read every line, modify freely, contribute back.
Get started in 30 seconds
Choose your platform and follow the steps.
macOS
Finder toolbar button
Then customize Finder toolbar and drag Claude Here onto it.
Windows
Right-click context menu
Right-click any folder in Explorer to see "Open Claude Code Here".
Prerequisite: Claude Code CLI must be installed first.
How to use it
After installation, follow these steps to start using ClaudeHere.
macOS — Finder Toolbar Setup
- 1Open FinderNavigate to any folder in Finder.
- 2Customize ToolbarRight-click the Finder toolbar area and select "Customize Toolbar...".
- 3Find Claude HereOpen /Applications in another Finder window, find the Claude Here app.
- 4Drag to ToolbarDrag the Claude Here app icon onto the Finder toolbar. Click Done.
- 5Click to LaunchNow browse to any project folder and click the Claude Here icon in the toolbar. Claude Code will open instantly in that folder.
Windows — Right-Click Menu
- 1Open File ExplorerNavigate to any project folder.
- 2Right-ClickRight-click on empty space inside the folder, or right-click a folder.
- 3Click "Open Claude Code Here"Claude Code will launch in a terminal window, automatically set to the current folder.
Configuration
If you prefer iTerm2, add this to your shell config (~/.zshrc or ~/.bashrc):
Restart your terminal after making this change. ClaudeHere will automatically use iTerm2 when detected.
Uninstall
Run as Administrator.